Will this work with my board?
If you can write on it, odds are ShareTheBoard can work with it
ShareTheBoard Secures Impact Awards at SXSW EDU 2026 and LTSMG 2026
The Content Camera is a desktop application that serves all of the features and functionality of ShareTheBoard as a virtual camera. This camera can then be made available to any camera-using application. Install the app once and enjoy legible, interactive, and secured whiteboard contents inside any of your favorite video conferencing or lecture capture apps.
User manual contents:
How it works:
The Content Camera serves your Content Overlay as a virtual camera. This view can then be shared in any camera-using application, simply by selecting the virtual camera. Detected board contents are automatically saved to Board Memory and presenters have multiple ways to share Board View links with their viewers.
What’s Board View and Content Overlay?
What’s Board Memory?
Initial flow:
Ongoing usage:
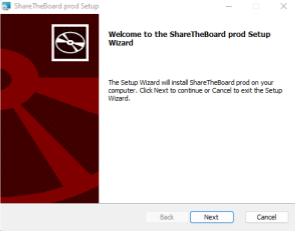
3.1 Execute installer:
File format = “ShareTheBoard-[version]-Setup.msi”
3.2 Allow the application to make changes on the PC
3.3 Select installation folder and press Install
3.4 Finish installation process (you may choose to run the application)
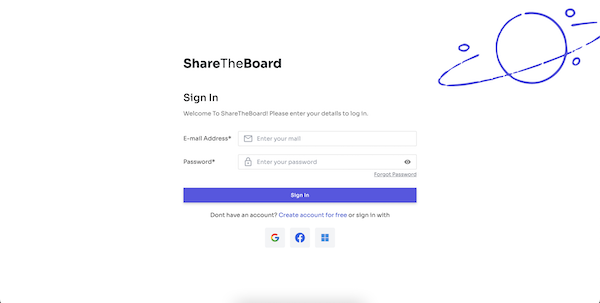
4.1 Log in to the app
Log in to your PRO/EXPERT/ROOM/TEAM/ENTERPRISE account using your email and password
(if you forget or lose your password, please use the retrieval option available on the login page)
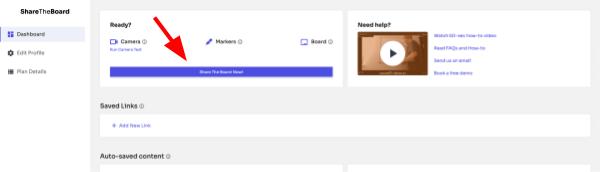
4.2 Start session
On the dashboard, click Share The Board Now
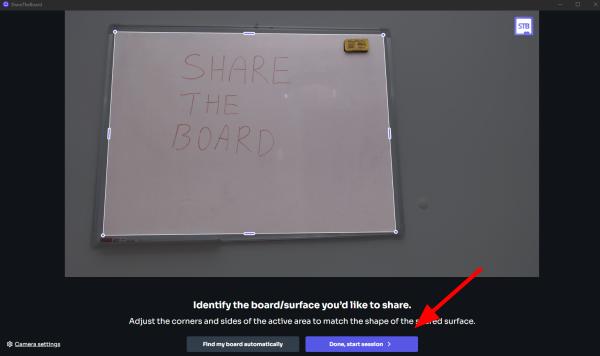
4.3 Identify the board (set work area)
Here, you have two options:
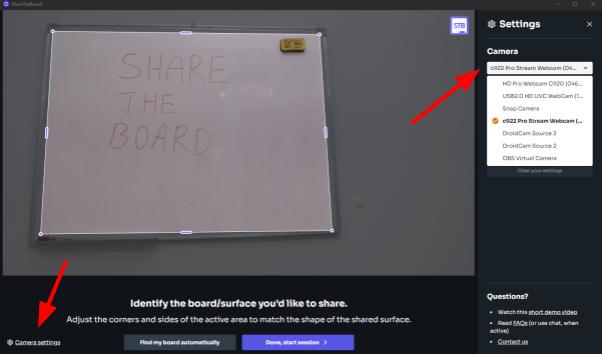
Note: If you have multiple cameras available, the Content Camera may not select the one you’re hoping to use. If needed, open Camera settings and change the source camera
(If desired camera is not available, please make sure it is not in use by another application)
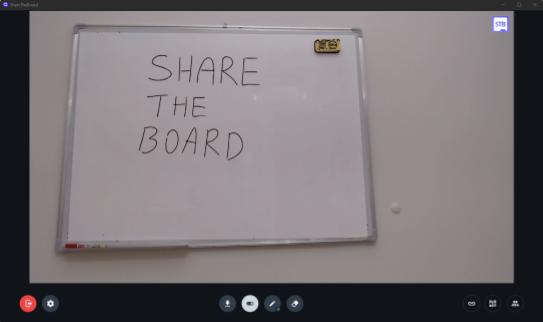
4.4 Complete onboarding
After setting your work area and activating your session, please wait a few seconds to make sure your content has been detected.
Take a moment to ensure that all the other settings are to your liking:
Congratulations, your content camera is working, and you are ready to use it in other applications!
If you’d like to save these settings to enable a click-free Quick Start in later sessions, see section 4.5 below; otherwise, you may close this application window (ShareTheBoard’s Content Camera will continue to run in the background) and proceed to section 4.6
4.5 Quick start
If you’re working with a fixed-position camera (e.g., in a specific classroom), you can save your onboarding settings. This way, your following session(s) will begin without having to identify your work area or apply settings.
Note: this setup is tied to a given PC/device and not to your ShareTheBoard account. This means that your settings will be shared with any users using the same physical machine. Each physical machine can have a unique setup (even if using the same ShareTheBoard account).
4.5.1 Identify Shared Devices
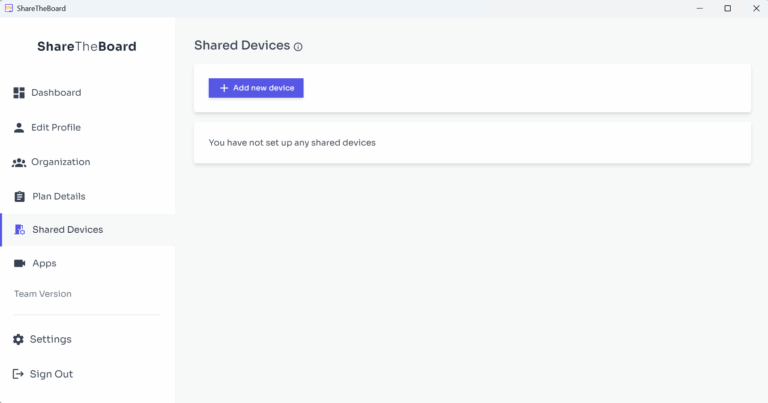
If you are an admin in an organization (TEAM, ROOM, or ENTERPRISE licenses), you can identify specific devices as “Shared Devices.” Doing so, allows you to apply and save a number of app and onboarding settings specific to a device or even a unique combination of devices. This, in turn, makes it possible for any user in your organization to skip onboarding on these devices and start ShareTheBoard sessions with one click (from the dashboard – see 4.2, or from the tray – see 4.6) or even with zero clicks (triggering via third-party apps – see 5.0)
To identify a specific device as a Shared Device, install the Content Camera app (see 3.0) on the device in question, login as an admin (4.1) and click Shared Devices in the left navigation. Next, click Add New Device and name the device as needed. You may also optionally turn on the “Static Link” for this device, ensuring that all sessions on this device will be available under the same, specified link.
4.5.2 Complete device setup
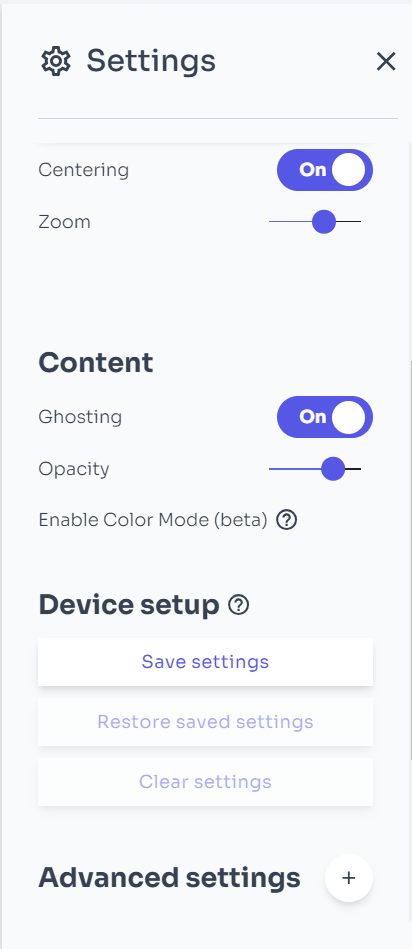
After you’ve identified your computer as a Shared Device (4.5.1), start a session (4.2) and click on the Settings icon in the lower right corner. Adjust settings as needed: identify work area, select camera, adjust flips, centering, ghosting and ignore area, activate Multi-Cam as needed. When ready, click Save settings to save all of your settings to the device.
NOTE: Settings are actually tied to the combination of the device (PC) and selected camera. This makes it possible to save unique settings for multiple cameras connected to the same device. For each unique camera-device combination, click Save settings once you’re happy with your changes.
If you make an adjustment during a session and would like to restore the previously saved settings, simply click Restore saved settings
To remove saved settings from a device (or device-camera combination), click Clear settings
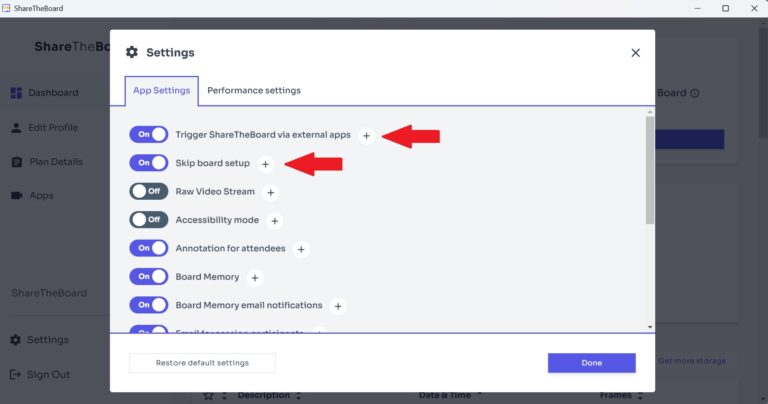
4.5.3 Adjust App Settings
To skip onboarding on your next session(s), you’ll need to adjust App Settings:
– During an active session: Click settings icon > Advanced settings > App Settings
– From the dashboard: click Settings in the bottom left corner
On the resulting popup, in the App Settings tab, make sure the first two options are activated:
NOTE: If you are a member of an organization, your admin may have already defined settings for any shared devices. You can use your admin’s settings or choose to employ your own settings from your previous session. You’ll find the ability to adjust this option near the bottom of the same App Settings popup.
Click Done to apply settings and close the popup.
4.6 Managing your session with the Content Camera window closed
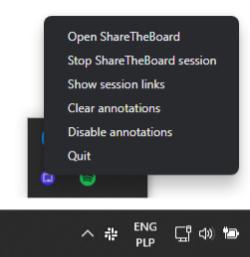
As the Content Camera runs in the background, you do not need its window to remain visibly open. Instead, you can use the shortcuts available to you directly in the Windows app tray.
Click on the caret (upwards-facing arrow) in the system bar at the bottom right of your screen. Then, right click the ShareTheBoard icon to reveal a menu of shortcuts.
If you use ShareTheBoard regularly, consider attaching the ShareTheBoard icon directly onto your system bar. To do so, simply drag the icon onto the bar.
4.6.1 Show session links
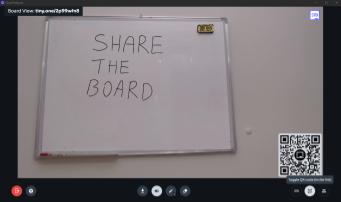
By default, the Content Camera generates unique links for each session. These links lead to the Board View for your specific session. Here, viewers can save board contents, zoom in on them as needed, and even contribute digital content of their own, directly to your board. They can also seamlessly access Board Memory during the session, using the timeline right there in Board View.
To trigger the visibility of the links – both as a shortened URL and as a QR code – select Show session links in the shortcut menu. To then hide these links, select Hide session links.
You can also trigger visibility of the QR code with the app window open – simply click the QR toggle button.
NOTE: some video conference providers (e.g., Google Meet) show a mirrored image to their presenters by default. This means, that any session links may appear backward to presenters (though they’ll always appear correctly to viewers).
4.6.2 Manage annotations
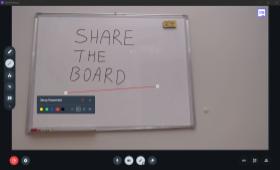
Your viewers can contribute content directly to your board, using digital annotations. Annotations are available to all session participants. Presenters can contribute digital annotations directly in the app window. Viewers must open Board View in a browser (via session-specific links — see 4.6.1) to contribute annotations
Annotations are disabled by default in the Content Camera. This is done to allow presenters to focus on their (actual) whiteboard and to control when/how viewers contribute content of their own. Annotations can be enabled during your session inside the application window or via the shortcut Tray menu.
The shortcut menu provides two convenient options for managing your viewers’ digital content contributions:
After you’ve completed installation (section 3) and setup (section 4), you simply need to select the Content Camera as the video source in your application of choice. Here are a few examples:
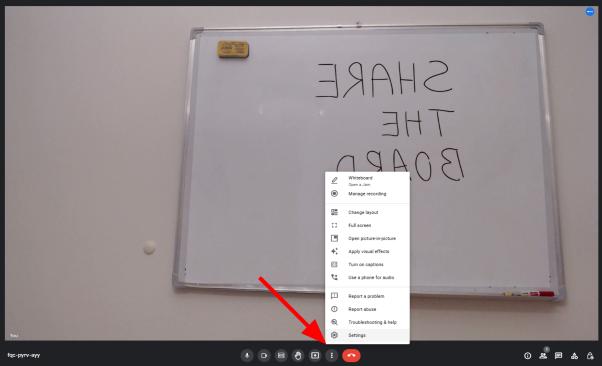
5.1 Google Meet
During your session, click the 3 dots menu and select Settings
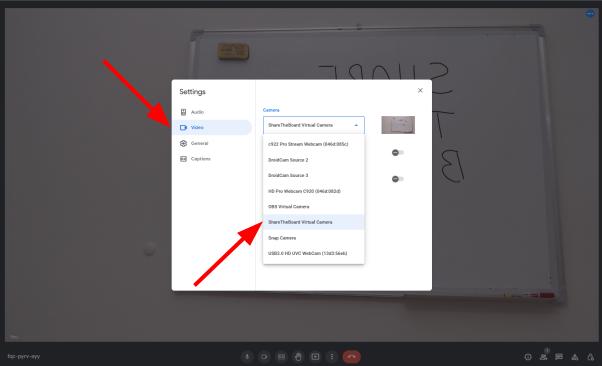
Then go to the Video settings and from the dropdown menu of available cameras, select ShareTheBoard Content Camera
NOTE: this may also appear as “ShareTheBoard Virtual Camera”
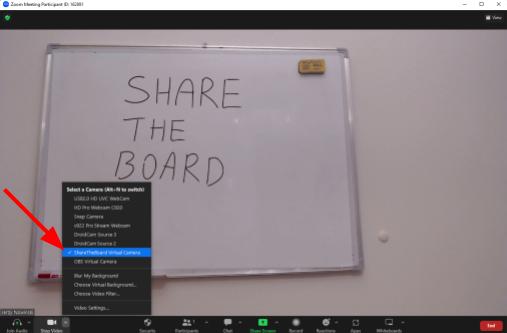
5.2 Zoom
During your meeting, press the arrow near the camera icon. Select ShareTheBoard Content Camera
NOTE: may appear as “ShareTheBoard Virtual Camera”
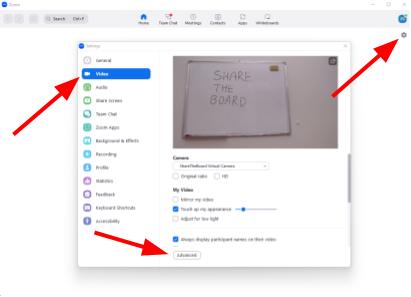
5.2.1 Zoom Troubleshooting
If you notice any issues with the Zoom interface (i.e., lags while using the ShareTheBoard Content Camera):
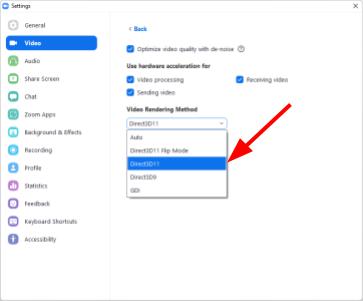
Then, select Direct3D11 under “Video Rendering Method”
This should eliminate the lags inside of the Zoom interface.
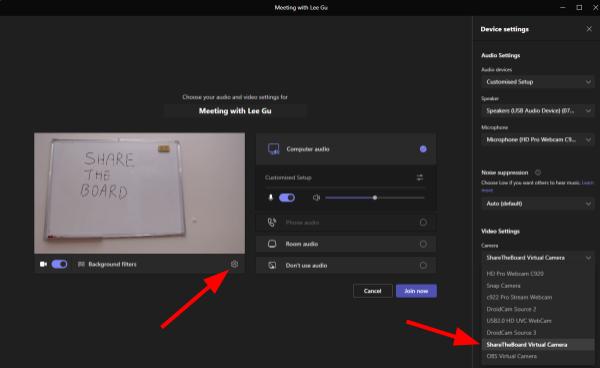
5.3 Microsoft Teams
In the pre-meeting configuration screen open Settings (gear icon)
Under “Video settings” click the Camera dropdown and select ShareTheBoard Content Camera
NOTE: it may also appear as “ShareTheBoard Virtual Camera”
5.4 Panopto
Launch Panopto for Windows Recorder, Panopto Remote Recorder, or Panopto Capture
Look for the Video dropdown menu. Then select ShareTheBoard Content Camera (virtual camera) as the primary or secondary video source.
Note: You may choose to use the Content Camera as a Content source if you’d like to differentiate between speaker video and whiteboard content.
Use the feed preview to ensure that whiteboard contents are being captured correctly.
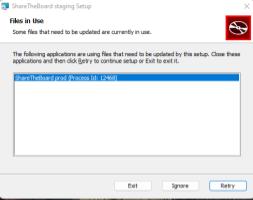
6.1 During installation
During installation or app updates, when prompted with information about processes you need to close:
6.2 Virtual Camera doesn’t appear within other applications
First, try restarting the application in question (e.g., Zoom or Skype); otherwise:
6.3 Zoom UI lag (for more info, see section 5.2.1)
If you notice any issues within the Zoom interface (i.e., lags within the interface while using the ShareTheBoard Content Camera)
6.4 Auto-start is not working after startup
The ShareTheBoard application opens at system startup along with other applications. A meeting in a conference app (e.g., MS Teams) can be started before the ShareTheBoard Content Camera is initialized and in such cases, the auto start feature will not work.
6.5 Frozen ShareTheBoard screen in the conference application
In rare cases you may see a frozen frame or static STB default screen. In such situations, try these steps to unblock the application:
List of tested/supported applications:
Input stream:
We are aware that at the moment our application is not compatible with:


